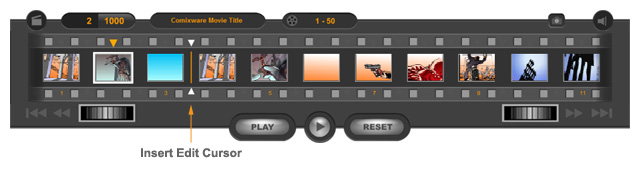
Insertion Slot
This
is the "slot" between any 2 bordered scenes in the Timeline
where you drop your clip or scene(s) for insertion. The slot "cursor"
(a vertical orange line with 2 arrows at each end) is normally concealed
but comes to live when you hover your mouse over it for more than
1/2 second.
Insert by Drag-N-Drop
a)
You may drag-n-drop clip from Asset Bin (or from Preview Window) to
insert it at a desired "slot" anywhere in the Timeline.
b)
You may drag-n-drop a scene or a selection of scenes from one place
of the Timeline to insert it to a different place in the Timeline.
c)
When you drag a selection hovering over an insertion slot, the slot
"cursor" will flashes itself alerting you an "insert"
is imminent.
Insert by Copy-N-Paste
An
insert can also be done by copying scene(s) into memory first, then
insert a "clipboard" copy of it to the desired location.
The way to go about such paste is to right-mouse-click on the desired
"insertion slot". When the contextual menu is open, click
on "paste" command to perform the insert.